📸 How to Take Perfect Reference Photos
The quality of your reference photos directly impacts your AI-generated results. Follow this comprehensive guide to ensure stunning, professional pre-wedding portraits!
🌟 Why Good Reference Photos Matter
Our AI analyzes your reference photos to understand your facial features, expressions, and style. Clear, well-lit photos help the AI create more accurate and beautiful results. Think of your reference photos as the foundation for your dream pre-wedding portraits!
✅ The Perfect Reference Photo Checklist
- Natural Lighting: Take photos during daytime near a window or outdoors in soft sunlight (avoid harsh midday sun)
- Clear Face Visibility: Both faces should be clearly visible, front-facing, and unobstructed
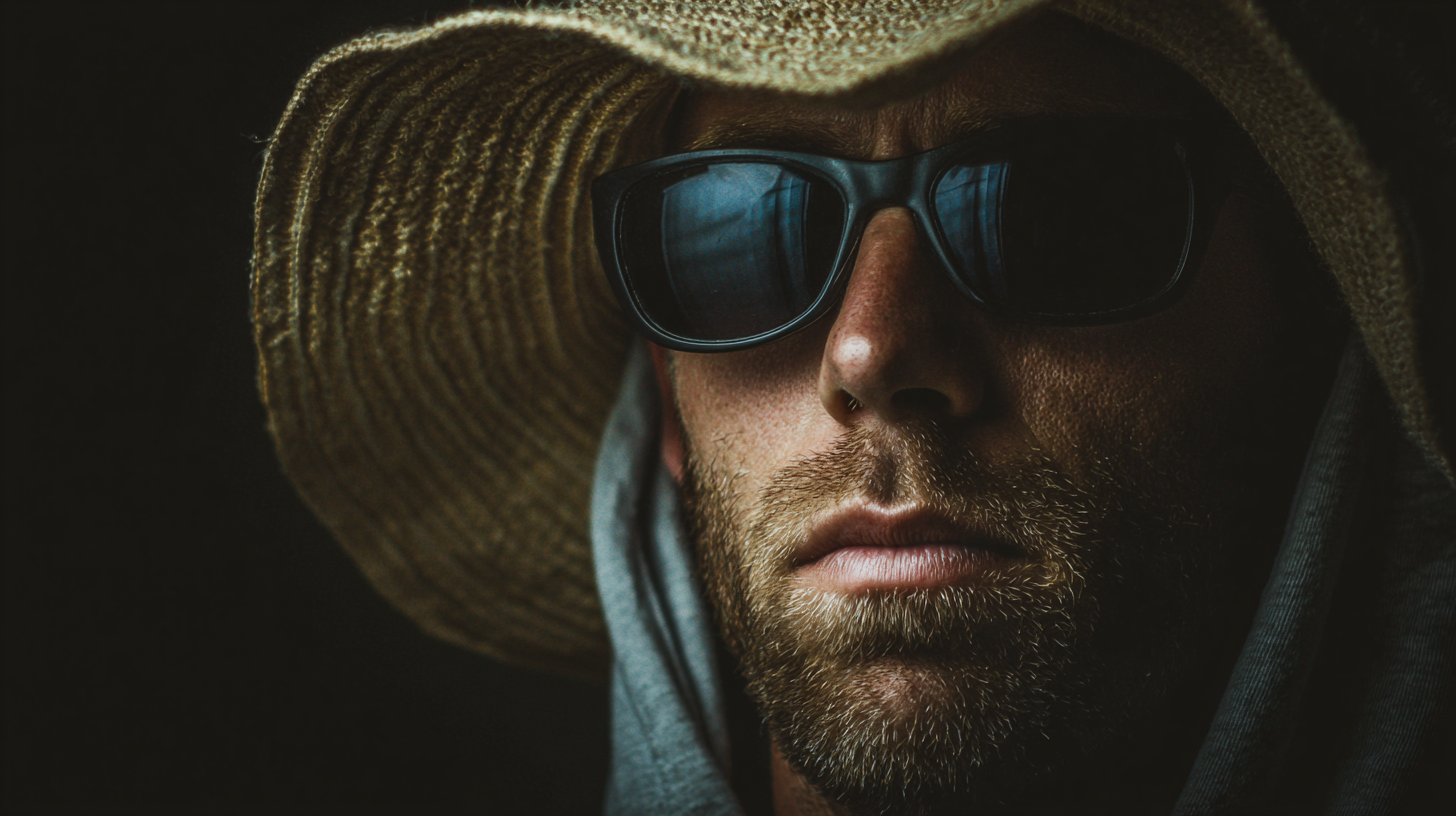
- No Accessories Covering Face: Remove sunglasses, hats, or anything blocking your face
- Neutral Background: Simple, clean backgrounds work best (white walls, outdoors, plain settings)
- Good Resolution: Use your phone's highest quality camera setting (no screenshots or low-quality images)
- Natural Expression: Smile naturally or have a relaxed expression (no forced poses)
- Minimal Filters: Upload unfiltered photos - the AI works best with natural images
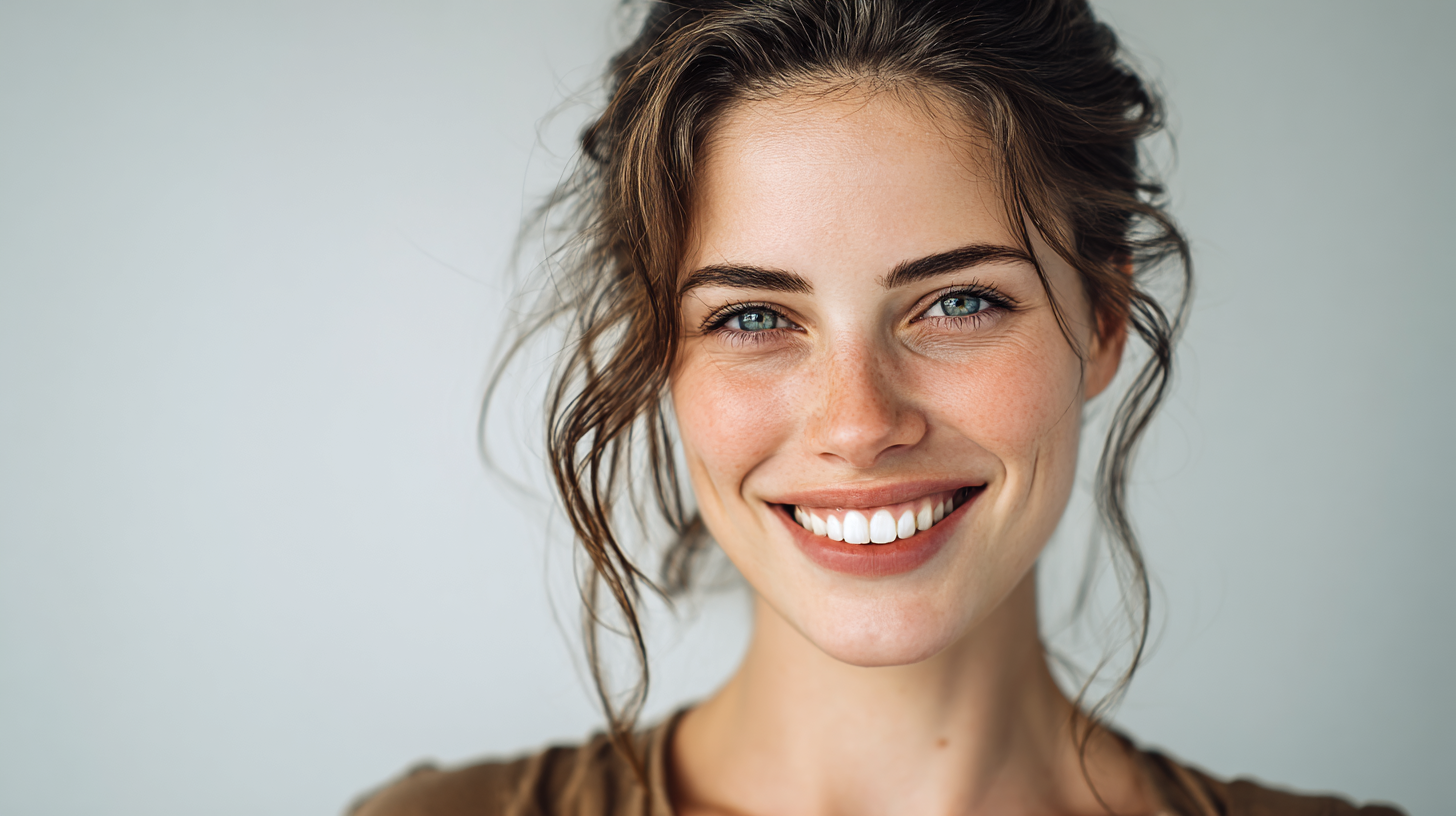
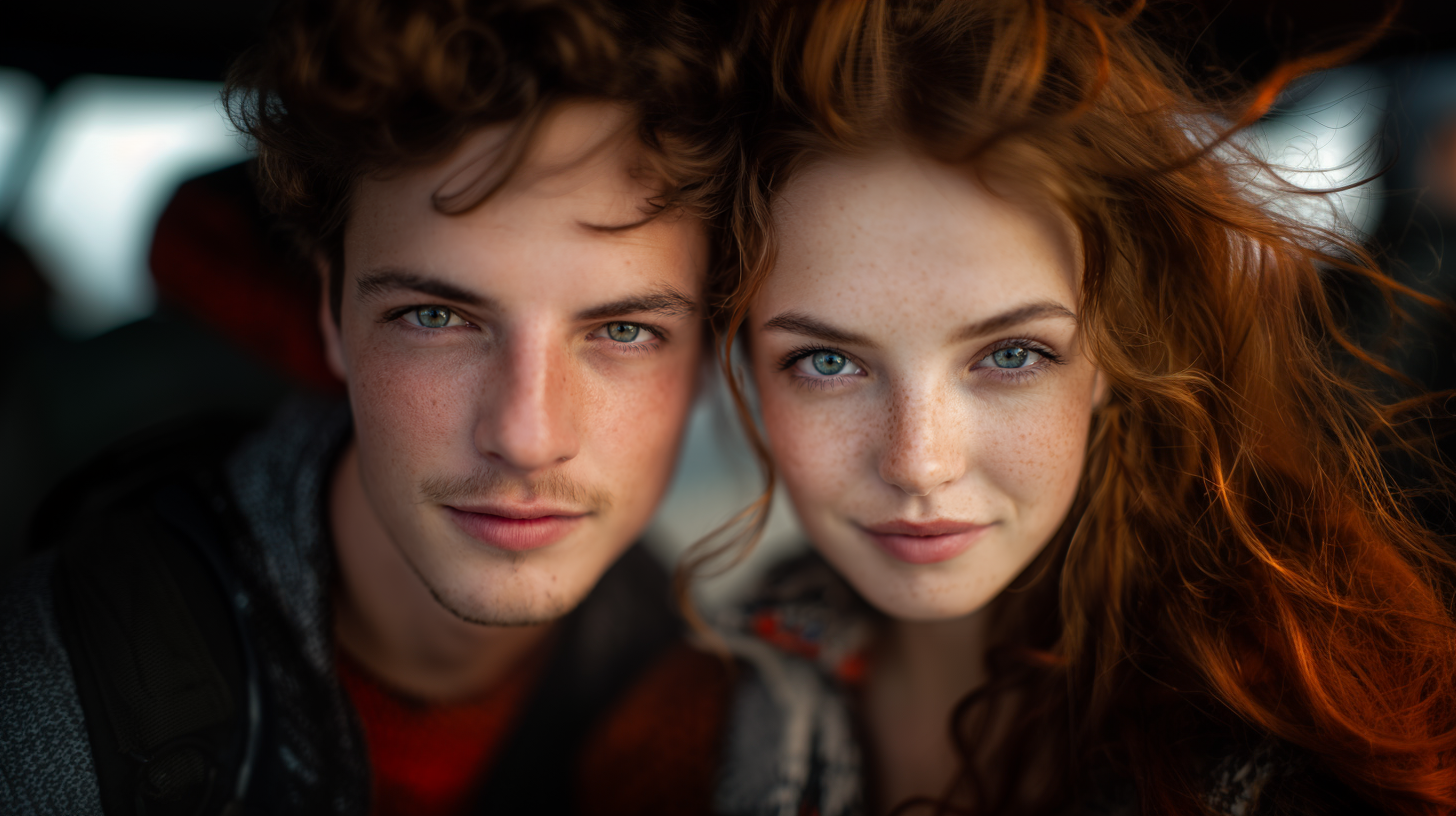
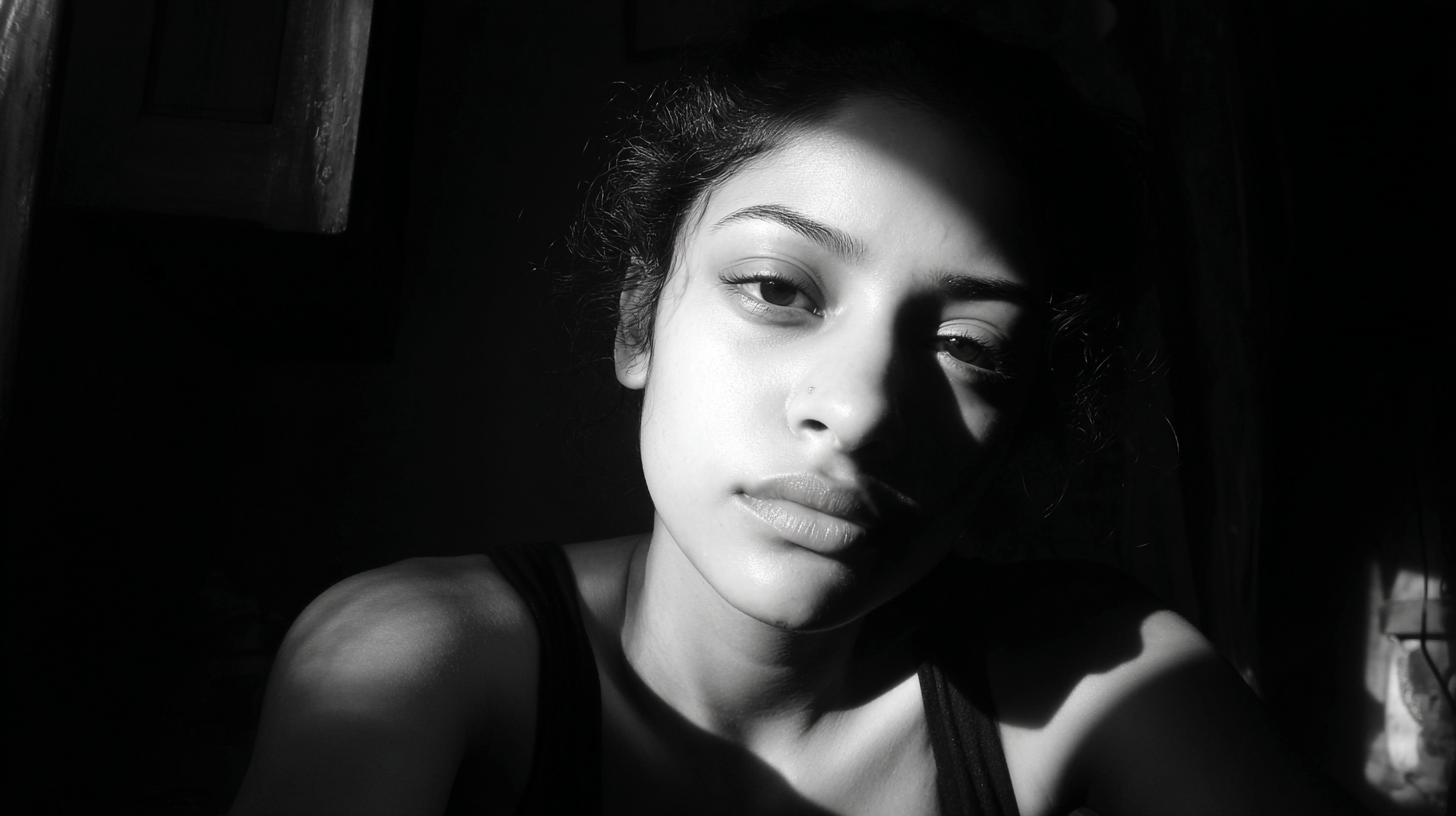
📷 Good vs. Bad Reference Photos
✅ GOOD Examples - Use These!
❌ BAD Examples - Avoid These!
💡 Pro Tips for Best Results
💑 For Couple Photos:
Upload a mix of solo photos (each person individually) AND couple photos together. This helps the AI understand each person's features clearly while also seeing how you look together.
📸 How Many Photos to Upload:
Recommended: 3-5 photos - Mix of different angles and expressions. More variety helps the AI better understand your features and create more accurate results.
☀️ Best Time to Take Photos:
Golden Hour: 1 hour after sunrise or 1 hour before sunset provides soft, flattering light. Indoor: Stand near a large window during daytime for beautiful natural light.
🎨 Variety is Key:
Upload photos with different expressions (smiling, neutral, laughing), different angles (front-facing, slight side angle), and different outfits. This gives the AI more data to work with.
⚠️ Common Mistakes to Avoid
❌ Heavy Filters & Face Apps
Avoid photos with beauty filters, face-smoothing apps, or heavy editing. These alter your natural features and confuse the AI, resulting in less accurate results.
❌ Group Photos (3+ People)
Stick to solo photos or couple photos only. Group photos with multiple people make it harder for the AI to identify which faces to focus on.
❌ Dark or Blurry Photos
Poor lighting, motion blur, or out-of-focus images won't give the AI enough detail. Make sure your photos are sharp and well-lit.
❌ Extreme Angles or Poses
Avoid extreme side profiles, upside-down photos, or unusual angles. Front-facing or slight 3/4 angle photos work best for facial recognition.
📱 Quick Photo Setup Guide
5-Minute Photo Session for Best Results:
- Find Natural Light: Stand near a window or go outdoors in soft daylight
- Clean Your Camera Lens: Wipe your phone camera lens for crisp photos
- Remove Accessories: Take off sunglasses, hats, scarves covering your face
- Take Solo Shots: Each person take 2-3 front-facing selfies with natural expressions
- Take Couple Shots: Get 1-2 photos together, both faces clearly visible
- Check Quality: Zoom in to make sure faces are sharp and well-lit
- Upload & Create: Upload your best 3-5 photos and let the AI work its magic!
🎯 What to Expect
Remember, our AI creates artistic interpretations inspired by your appearance. The better your reference photos, the more accurate and beautiful your AI-generated pre-wedding portraits will be. Think of it as giving an artist the best reference material to paint your portrait!
✨ Final Reminder:
The AI analyzes facial features, expressions, and style from your reference photos to create stunning pre-wedding portraits. Following these guidelines ensures you get the most beautiful, professional results possible!